Thursday, May 24, 2012

Homemade Sidewalk Paint


It's that time of year, summer's here! Lots of enjoying the sun, sprinkler, fun...for a week. Then the kids start asking "mom, what is there to do? We're bored!" This is where a fun but inexpensive craft comes in, making your own sidewalk paint! Just using a couple of food staples on hand, you have a great way to keep the kids busy and inspired....for a while :)

Homemade Sidewalk Paint

4 Tbls warm water
3 Tbls cornstarch
6-8 drops food coloring

I found using this cheap dip bowl was perfect for making the paint, leaving less clean up for mom, which I love!

First, fill each section with warm water 


sprinkle the cornstarch over water


 drip the food coloring in and mix


easy!


 paint ready to be used


If your paint is too thin, you can always add more cornstarch- a teaspoon at a time- to thicken. It gets much brighter as it dries, and VERY easy to clean up! With a shot of the hose, my whole porch was clean in just a few seconds.

So there you go, cheap, easy and fun, what more could you ask to make your summers a little less boring?

Happy Summer!


Saturday, March 3, 2012

Maple Apple Rings


This looked heavenly to me, I'm always looking for ways to incorporate fruit into my breakfast dishes. Light and fluffy like a pancake, with a sweet, soft ring of apple inside. Forget the forks, we found dipping them in syrup was the best way to eat them, yummy! We sat satisfied after our delicious Saturday breakfast, sticky fingers and fully bellies :) Here's how to make em:

Maple Apple Rings

Ingredients

  • 2 medium apples, pared and cored
  • 1 cup flour
  • 1 teaspoon baking powder
  • 1/4 teaspoon baking soda
  • 1/4 teaspoon salt
  • 1 egg, beaten
  • 1/2 cup buttermilk or sour milk (to make sour milk, add 1 1/2 tsp vinegar or lemon juice to 1/2 cup regular milk) plus more to adjust for consistency
  • maple syrup

Directions


Slice apples crosswise into 1/8" thick rings. (a mandolin slicer works great for this, I didn't have one, so just sliced as thin as I could get em)


Whisk together flour, baking power, baking soda and salt. Beat in eggs and buttermilk (or sour milk), mixing just until incorporated.


Heat a large skillet over medium-low heat and grease lightly. Dip apple rings into batter and allow excess batter to drip off. If the batter is too thick, add more buttermilk, one tablespoon at a time, until it is thick enough to stick to the apple ring, but thin enough to have excess drip off. You might want to cook a test apple ring to make sure the batter is to your liking before adding too much milk.

Cook apple rings on skillet until golden brown, turning once. Important part- Skillet temp needs to be around med-low... if the skillet is too hot, the outside dough will burn before the apple inside starts to soften.

You'll see the tops starting to bubble (as with normal pancakes) and thicken, this is the time to flip em. Be patient, you want your apple nice and soft inside!


Serve with maple syrup. Enjoy! :)


Friday, July 22, 2011

Sewing, Swapping, Sicky


The three shouldn't be mutually exclusive but it seems they've all filled my world lately. I wanted to apologize for not updating my blog in awhile (for the 1.2 people that read it) but due to the Blogging Without Obligation oath I took, I'll skip the apologizing, excuses and guilt and just say I'm glad to be back :)

There's been so much going on I don't think I can cover it all...mostly doing lots of Sewing- totes, bags and purses! Here are some of my recent projects:

Bandana Totes


These are so fun to make...I love buying bandanas of all colors and making big, colorful totes to use in grocery shopping, going to the lake, anything! They're durable, reversible and very unique.

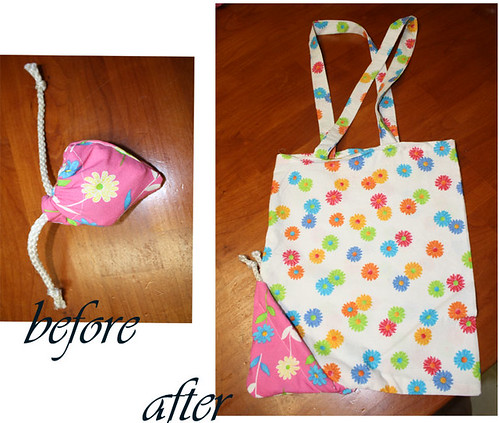
Here is a Compact Tote Bag that I made from a new pattern I was excited to try! Very easy, usable and perfect to roll up and toss in the car. I could use a ton of these!


I wanted to make a Hello Kitty tote for my friend Kayla in Maine..so came up with this :) I think it came out super cute, which gives me all kinds of ideas for Hello Kitty totes! I bought the HK fabric at Joanne's and cut out the face pieces and bonded them down with Crafty-Fuse.


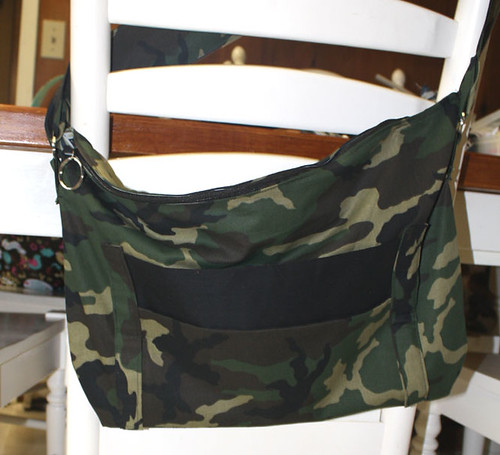
I made a Camo Bag for my niece-in-law, Michelle, who loves camo fabric. Durable, large and great w/ your favorite camo or khaki capris, I'm thinking of making one for myself :) Didn't use a pattern for this one..the lining is blue camo inside.


And of course I've made lots of Poochie bags! They're so fun to make, and perfect for my obsession of collecting bright, colorful fabrics.


Which leads me to my favorite thing of all time..Swapping!

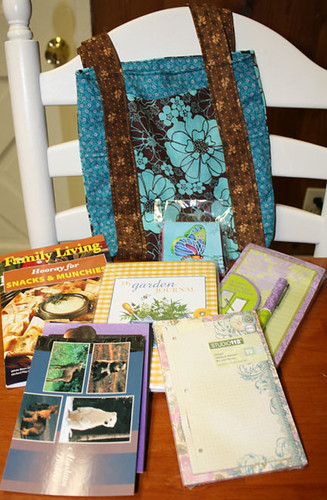
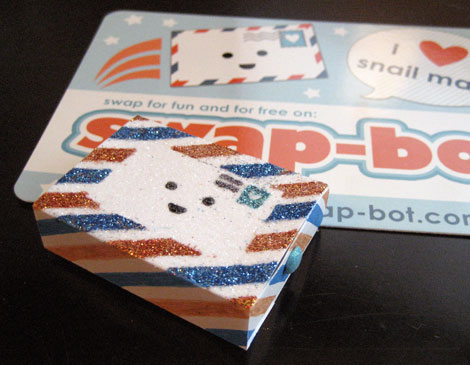
Meet me over at Swap-bot, my username is bobogrl, I'd love to swap with ya! I've met so many wonderful people from all over the world, gotten wonderful projects from talented people and been the receiver and giver of many RAKS (random acts of kindness). It's so rewarding making something special for someone "just because"..you wouldn't believe how it brightens their day. Check out my flickr for more projects I've used in swaps. The title photo is a wonderful package I received from swapper LauraAust , she sent me yards and yards of gorgeous, colorful fabrics to sew with! I'll be making her a special purse from a pattern she sent me, along with a matching wallet. Hope you join and swap with me sometime!


And now for the worst part, Sickness..ugh I'll try to keep it short. Some of you may or may not know I'm currently on dialysis as a result of End Stage Renal Disease. I had a catheter placed in my chest which was used for getting dialysis treatments three days a week. Unfortunately, my catheter became infected and I had a horrible blood infection, causing me to get a fever of 105 and ended up in the hospital for a week. After three days in the ICU, the antibiotics I received started kicking in and I'm slowly on the mend. They removed the catheter and we're using my fistula now, so all is good! I'm not a 100% yet but am slowly getting my mojo back. By the way, I want to encourage everyone to become an organ donor, there are so many on the waiting list (like me) for a kidney and everyone has a spare to give! If you've considered donating a kidney, the Donor Hotline will answer any and all questions. Donors can give a kidney at no cost to them, all expenses are taken care of! And you get lots of good karma points :)

So that's what I've been up to, I hope you're doing awesome! Come back when you can and drop a line..I'll be keeping the blog updated with more of my crafty creativeness as this summer lets me. It's a good life, and I'm grateful to have it!

~Deb

Sunday, February 13, 2011

Crochet Hat-o-Rama!


I've been on a crocheting frenzy lately, making crochet caps and hats. Having a lot of down time lately, it's a great way to keep my hands busy, stay productive and make gifts for friends and family. Here's my latest projects, thanks to my lovely model and daughter, Maddie...many of these hats were made for her cousins as gifts, a few are hers :) Below the pictures are instruction on making them...they're very easy, even the flowers come together in a snap.


All of these are made from a basic pattern I made up...start by chaining 60 (average large child to adult size, you can make it smaller or larger by adding or decreasing chains). Connect the chains with a slipstitch. * Chain three and begin double crocheting into each chain, until you get to your beginning. Slipstich to fasten and repeat * until hat is about 5 to 7 rows high (depending how how large you want it). On your next row, begin decreasing your hat by doing * four double crochets, skipping one, double crochet, skipping one, four double crochets, repeating * till the end of row. Next row, decrease by crocheting three double crochets, skip one, double crochet, skip one, etc. Following row, decrease by crocheting two double crochets, skip one, double crochet, skip one, etc. Last row, double crochet every other stitch, fasten off at end. You can add a puffy ball or any other type of design.

To make flowers, there are great tutorials out there..I like this one.

So that's what I've been up to..I'll warn ya though, this can be addicting! The caps go quite fast, so it's a craft you won't get tired of doing, which I like. You can leave them plain, add on ear warmers, sew on flowers (or as a friend does, hot glue accessories like beads, flowers, ribbon, buttons, found at Walmart and similar stores). They're really popular right now and so cheap to make! Try em out sometime :)

Sunday, February 6, 2011

Spice rubbed and BBQ chicken w/ Twice Baked Potatoes


Superbowl's here! I have a confession- I don't like football or know anything about it, really. But what DO know is that people like to eat yummy food during the Superbowl, and I'm down for that! No big parties here, just a simple family affair...wanted to make some easy, delicious grub for the main event.

I had two large chickens in the fridge and quartered them up (for a good chicken quartering tutorial, click here for a great tutorial. Now let's get cooking!

I wanted an easy dry spice rub for half my chicken and also wanted to make my own barbecue sauce for the other half...which, let me tell ya, there are TONS of bbq recipes out there. Some are very intricate, taking days to cook...others are quite simple and consist of a ketchup base. This recipe was simple but spicy, just a little kick and turned into a beautiful glaze. One of my pet peeves with many barbecue sauces is them turning out too gooey, thick or sweet. This one is pleasantly thin, leaving a flavorful kick to the chicken without making it too gunky.

Barbecue Sauce

1 cup brown sugar
1/2 cup chili sauce (recipe below if not using store bought)
1/2 cup rum
1/4 cup soy sauce
1/4 cup ketchup
1/4 cup Worcestershire sauce
2 cloves crushed garlic
1 tsp dry ground mustard
ground black pepper to taste

Chili Sauce

1 cup tomato sauce
1/4 cup brown sugar
2 Tbsp vinegar
1/4 tsp. cinnamon
1 dash salt
1 pinch red pepper flake or hot pepper

Add chili sauce to the rest of ingredients and simmer 30-45 minutes, until some liquid is reduced. Spoon over cooked chicken..it will cool as a nice glaze..but if you prefer, spoon over baked chicken and put back in oven for another 10 minutes at 350 degrees.

Spice Rub

2 tablespoons garlic powder
1 tablespoon ground cumin
1 tablespoon ground coriander
1 tablespoon paprika
1 tablespoon chili powder
1 tablespoon kosher salt
1 tablespoon freshly ground black pepper
1 teaspoon cayenne pepper
1/2 cup extra-virgin olive oil
1 lemon, zested

Rub blended spices all over raw chicken and continue cooking as normal.


this savory and spicy barbecue sauce simmered while I let my chicken bake

this raw chicken has been rubbed down with spices and ready to be baked


barbecue glazed and spice-rubbed chicken ready for the masses


Twice Baked Potatoes

These are delicious! While your chicken is cooking, throw some clean, dry potatoes...I bake them at 350 for about an hour. When cooled, slice them in half, scoop out the insides and mix the following:

cooked potato flesh
8 slices bacon
1 cup sour cream
1/2 cup milk
4 tablespoons butter
1/2 teaspoon salt
1/2 teaspoon pepper
1 cup shredded Cheddar cheese, divided
8 green onions, sliced, divided

Place bacon in a large, deep skillet...cook until brown. Drain, crumble and set aside.
To the potato flesh add sour cream, milk, butter, salt, pepper, 1/2 cup cheese and 1/2 the green onions. Mix with a hand mixer until well blended and creamy. Spoon the mixture into the potato skins. Top each with remaining cheese, green onions and bacon.
Bake for another 15 minutes.

these twice baked potatoes are packed with flavor!


Apple Crisp


This is the easiest, tastiest recipe I've ever found...literally put together in a few minutes. The ginger is a perfect mate for the sweet apples, adding just a little zing. I doubled the crusty topping, since my family likes a thick crust on top of their fruit crisp. A great way to use up those apples around the house..I've substituted lots of different fruits for this..canned pears, fresh blueberries, even strawberries and peaches! Such a simple recipe.

Filling

6 cups diced apples (or your fruit of choice)
1/3 cup sugar
1/2 tsp ginger
1 Tbsp lemon juice
1 Tbsp flour

Topping

1 cup flour
3/4 cup brown sugar
1/2 tsp cinnamon
1/4 tsp salt
1/2 cup butter (1 stick)


peel and chop your favorite apples..I used Fuji here

I used Sunmaid mixed extra-large raisins..added a sweet pop of flavor

spices, flour and brown sugar are all that's needed to compliment sweet apples


Mix filling together in bowl, put in a 13x9 greased pan and bake at 350 degrees for 10 min. While filling bakes, put together topping....

Mix dry ingredients well. Cut in cold butter until you get pea-sized crumbs (I like to use my hands, so you get big chunks). Sprinkle over hot filling and bake for 20-25 minutes, or until browned. Serve with ice cream or whipped cream for a special treat!

all baked up and ready to eat!


I'm back, baby!

It's so good to be back! Did ya miss me? After three long months of enduring a strong and rare fungal infection, I'm finally getting my groove back. Many of you know I have chronic kidney failure and am currently on dialysis, awaiting a kidney transplant. Due to my health issues, I'm susceptible to getting infections...and boy, did I get a doozy. I'm still on IV infusions for antibiotics every day, but am much, much better.

So many times I wanted to check back on my blog, but I knew I wasn't coming back until I could really commit to it. Doesn't mean I quit cooking and baking...in fact, all the time sitting in hospitals and dialysis chairs means I've had lots of time to catch up on my crocheting and crafting! I'll be posting pictures soon of some of my creations.

I hope all my online friends haven't forgotten about my little blog...stop by and check out my news when you can! For now I'll be updating as much as I can and keep working on getting my mojo back :)